The Cob Oven: We Have a Base!
7 August 2017 • Cob Oven, Make
Now we're getting somewhere! The base is complete! This part was really intimidating at first but once I got going it was surprisingly easy. Do I have any experience laying brick you might ask? Nope! I watched a few youtube videos and called myself an expert. Most videos I watched seemed way too intense and technical. I figured I wasn't building a wall for our house or anything so I could probably wing it a bit more than most videos suggested. Here's what I did:
- Filled up the hole with small drainage rock to ground level. (We bought a cubic yard for around $40 and our neigbour with a trailer helped us pick it up. If you have it delivered you pay around $120, yikes!)
- Leveled out the rock layer as much as I could
- Laid the first layer of brick directly on to the rocks and checked it with a level
- Bricked and mortared up until I had used up all the brick (We spent about $25 on mortar)
- Once the mortar had dried for 24 hours we filled the entire base with drainage rock
Is it perfect? Not exactly. But it sure is sturdy and it looks pretty good I think!
Next up is the wine bottle and sawdust + building soil layer for insulation. I actually did this already too but it was a total flop. I looked around for sawdust but most local hardware stores cut MDF and other non-hard wood so I didn't want that junk in with the sawdust. I ended up finding a giant bag of sawdust/shavings on kijiji for $10 but long story short, shavings are not good for this layer. Ugh. Ideally this layer would have dried hard but since my sawdust was more wood shavings it just dried as dirty wood shavings.
No big deal though! I'm just scooping it out and trying again with actual sawdust. I ended up contacting a packing company that a friend told me about and they said I could come by and pick up the sawdust later this week, yay!
In the meantime I'm in the process of sifting the building soil that I'll use to build the oven. Dave whipped up a sifter for me using some scrap wood and hardware cloth (you can see it in the top photo).
So that's where I'm at now! Not too bad! My goal is to have it done before Dave goes back to work in the fall.
I got this.
Backyard Herbology: Yarrow
1 August 2017 • Backyard Herbology, Make, Medicinal Herbs, Yarrow

Recently I took a 4 week Practical Herbalist course at Little City Farm. I learned so much! What was really inspiring was realizing how many useful things grow around us, usually considered as weeds! Last week I was browsing through this book looking at a plant called yarrow when Dave peers over my shoulder and says "Hey, I think we have that growing in the front lawn". Turns out he was right!
Side Note: Turns out when we "forgot" to mow the front lawn for a few weeks a bunch of cool stuff popped up! Besides yarrow we found wild strawberries, thyme and daisies! Love it!

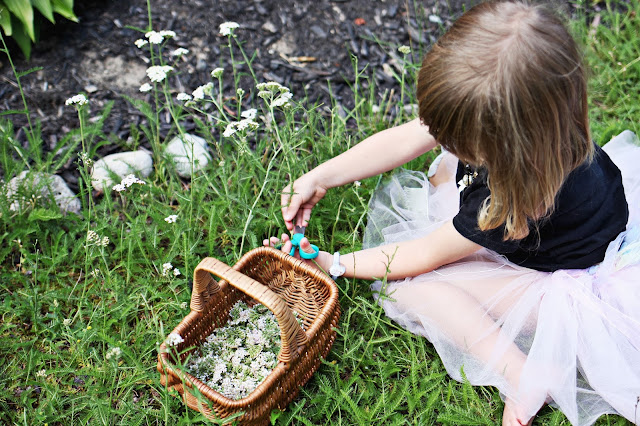
So with my trusty harvester Iris, we snipped all the yarrow flowers that were growing out of our overgrown lawn to make a tincture. A tincture is basically just where you steep/infuse something in alcohol. I currently have a jar of all our yarrow flowers infusing in a jar of vodka on our windowsill. You may be asking, what the heck are you going to do with a large jar of weed vodka?! Ha! Well after a few weeks I'll strain it into a few small dosage bottles and it can be used for a bunch of low-key medicinal purposes such as reducing fevers, relieving stomach cramps and indigestion, and for *ahem* crampy lady problems. Plus tinctures last a loooong time so I'm looking forward to learning other ways I can use it too.
This is one of the first medicinal herb things I've made so I'm curious how it turns out and works later. I've always been a bit skeptical of natural or alternative medicine but hey I'm willing to try new things! Especially when it's just for everyday kind of maladies.
Subscribe to:
Posts (Atom)


