The Cob Oven!
1 October 2017 • Cob Oven, Make
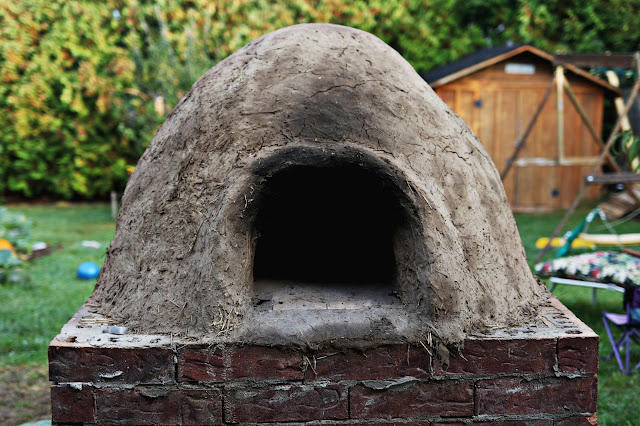
It's done! It's usable! We've used it! It works!
This thing was a mighty labour of love but we couldn't be more pleased with the results! It's a little unrefined at this point. We didn't get around to doing the final finishing layer quite yet, but it's 100% usable as it is right now, and I'm A OK with that.
The final oven step (everything above the base) took us a full morning/afternoon with no kids around. It was by far the most satisfying but nerve wracking part. Would this dirt I dug up actually hold up as building material?! Will it collapse once we remove the sand form?! But alas, it all worked out! The walls are now about 12 inches thick and even when the fire has been burning for a few hours the outside is still cool enough to touch.
It takes about 2-3 hours to heat up the oven so it's hot enough for pizza. Which seems like a lot of wood to use but again our neighbours have been amazing giving us scrap wood so we haven't had to buy any yet. Usually if we're having pizza for dinner I'll start a fire around 2 and throw a few pieces of wood in it every 20 minutes or so when it starts to burn down. Once we're ready to cook the pizzas I use a metal hoe and either remove some of the ash/coals into a metal bucket or push them to the back of the oven. Then, using a wet mop-like tool Dave fashioned out of a scrap fabric and a wooden pole, I'll quickly mop the floor of the hearth to clean up any ash. Then you just slid your pizza right on to the hearth and cook it! It took a while to get the hang of it but now I feel pretty confident making upwards of 10-12 pizzas depending how many people we're feeding.
Words cannot describe how amazing it was to eat the first (albeit slightly charred) pizza from the cob oven. Pizza has never tasted so good! And fast! The first few pizzas only take about a minute to cook.
Our next goal is to build a removable door for the oven so we can start baking bread in it. For bread baking you need to remove all the ash and coals from the oven before you bake. Plus you need a door to keep the residual heat inside. I recently took a sourdough bread making class at Little City Farm (where they bake their bread in a cob oven too) so I'm really excited to try that next.
Some Final Thoughts
- I know I've said this throughout the entire process but I cannot believe that we built this! Using stuff we mostly found and with dirt in our own backyard! It has really opened my eyes up to what we can do if we only take the time and just start
- Our cob oven took all summer to complete but I would say that is 100% due to having two little kids around. Most of the building took place either during naps, once the kids went to sleep or when Dave could fully take on kid duty to free me up to concentrate on the oven. If you don't have kids you could probably get this done in 2 weekends
- I think in total we spent around $150 for everything, not bad!
I'm thrilled and slightly relieved that this project is now complete. It will be so nice to enjoy the oven and move on to a new project :)
I didn't get into the specifics of how we built our oven (it would take forever) but if you are interested in making one of these for yourself you have to check out Kiko Denzer's book. Ours is totally covered in mud and well worn now. Or shoot us an email! We'd be happy to chat more about it :)
Subscribe to:
Posts (Atom)


